Tag Archives: revising

10 Steps After “The End”

Guest Post by Editor and Author Adria Laycraft

So you wrote a book … CONGRATS! Not as many people as you would think make it this far. Writing and completing a novel is a big accomplishment. Take a moment and relish that. You deserve it.

Now here are ten steps to take before seeking critiques from others:

1.  Let it rest. The more space you can manage to put between yourself and the work, the more discerning you will be when you come back to it. But you MUST get some distance in order to see the work objectively.

2.  You let it rest, right? No, overnight is not enough. Go write something else. Plant tulips. Walk the dog. Take up yoga. You’ve had your head in this story for way too long, you know it’s true, so really try and get clear of it … and only time can do that.

3.  Now before we get into step three, I want to make sure you realize how serious I am about that rest time. If you’ve really done that, then it’s time to read through, make notes, and edit yourself. Draw up your plot points. Look for places to increase the tension. Be ruthless and delete what doesn’t further the plot, no matter how well written. You will likely do some line edits in this phase, but don’t let it consume you. There’s time enough for that later.

4.  Write a back cover blurb. This tests your knowledge of theme.

5.  Now write a synopsis. Two pages, single spaced, that sum up your story’s plotline, including the ending. This forces you to examine plot in big picture mode, and it will be useful later when you are sending in your submissions. Steps 4 and 5 are somewhat like reverse engineering–you want to take the finished product (your manuscript) and break it down to study the bare parts, the ingredients, and check their quality and coherency.

6.  Search out your story promises. Does the opening reflect what’s important? Does the ending resolve the promises made? If your opening scene is romantic, but it turns into an action thriller, that’s not fulfilling the story promise. Does the opening hint at things that are never important later? Those story promises need to be filled, or the hints rewritten to point to important plot items. And first lines are important, so if there is a place, person, or thing featured in the first lines that isn’t an integral part of the story, it needs to be deleted.

7.   Rewrite based on your findings, then scan through it again.

8.   REST. Yes, again. For weeks. Months if you can stand it. Here again we benefit from seeing the story anew after we’ve ‘forgotten’ it a bit.

9.   Now read again, fresh-eyed, and search for lines where you say the same thing twice and rewrite into one. Watch for where the word choices aren’t quite right and find better ones. Polish your prose so descriptions use subtext that enhance your theme, and subtle foreshadowing is in place to help make your ending surprising but inevitable. Check any spelling, punctuation, or grammar you are unsure of. You want your manuscript to appear as professional as possible.

10.   You’re ready for beta readers! Remember to be clear on your theme and plot before receiving critique so you can see where suggestions work or don’t work for the story you are trying to tell. Be prepared for many more revisions! Even a book deal will mean more editing to come. Writing, and publishing, is very much a long game.


Editor, Author, and Wood Artisan, Adria Laycraft tries to use her fickle creative squirrel nature as a tool, bouncing between several projects at any given time while wondering why people stare. Her new website (coming soon!) is at www.adrialaycraft.com with information about editing services. Watch for her novel Jumpship Hope coming from Tyche Books.

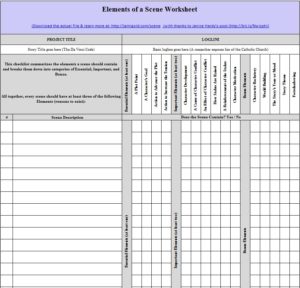
How to Revise a Scene

A scene is a unit of writing which moves the story forward. There are two types of scenes: action and reaction scenes. Action scenes have an objective, an obstacle and an outcome. Reaction scenes have emotion, analysis and decision. If you need more information on scenes and scene structure, I recommend James Scott Bell’s book Revision and Self-Editing for Publication.

THE STEPS

A) THE SET UP
This section is a lot of work, but the benefits are worth it. Chances are, if you have an agent or an editor (publishing house or otherwise) you’ll be asked to submit a scene outline.

1) Identify and number the scenes. If I am writing in chapters, I‘ll number the scenes for Chapter 1 as 1a, 1b, 1c. If I’m not writing chapters but scenes, I number them as I go along.

2) On a spread sheet, write a one sentence (or two at most) descriptor about each scene.

3) Identify whether a scene focuses on the main plot (M) or subplot (S). This will help you see what kind of balance or structure your plot has.

4) Write an About statement which explains your story. It should be only one sentence long. For example: This story is about a boy who must understand forgiveness to defeat an evil wizard to save his school. Put this line at the top of your chart for easy reference. Sometimes this is called theme.

5) Turn the About statement into a question. This is the story question and it is what the climax must answer. For example: To save his school, can the boy learn to understand forgiveness in time to defeat the evil wizard?

6) Note if scenes are Action, Dialogue, Exposition, or Reflection/Reaction. There are many more types of scenes, but I like to keep it fairly simple and use only four. This will reveal how the story is balanced. For example, are action scenes followed by reflection/reaction scenes? Are there too many exposition scenes? Too much exposition scenes may mean that there is too much telling and not enough showing or clumped together, they may halt the pace.

7) Create columns for General Notes, Character Appearances, POV, Time of Day/Location or other things important to your story. Then look for balance and continuity and logic problems. For example, if you have one main POV character, but interject with a secondary character, it wouldn’t make sense to have the bulk of middle chapters form the secondary character’s POV. If you do, then you have to decide whose story this is and find the appropriate story telling balance.

B) DECIDE IF SCENES ARE NECESSARY BEFORE YOU REVISE
Neglecting this step and revising before you understand the problems in each scene can be a waste of time. Why put the effort into revising only to discover it should be deleted or that it needs to be rewritten because it’s not doing an adequate job of moving the story forward. Or that a bridge scene needs ot be written for effective transition which means that the scenes before and after need to be changed.

1) Determine if each scene reflects or addresses what the story is about (step 4). Each scene must also work toward answering the story question (step 5), or in other words, each scene must work toward the climax.

2) At this point in the process, I look to apply the rule of three, where things should happen or appear at least three times. If they don’t either they’re not needed and should be eliminated or must be added. For example, I have one scene with a secondary character who has a small but important contribution to a murder investigation. I am thinking that I’d like her to appear in other books in the series. To make her contribution and her character more memorable, I need to include her at least two more times in the novel. This might be done by adding her into existing scenes or writing new scenes.

3) Ask if the scenes are hitting all the beats, all the points of good story telling structure. This may entail looking at your story from the Three Act Structure or the Hero’s Journey, for example. If you are missing the Crossing the Threshold Scene, write it now.

C) REVISE THE SCENES
Your story structure is fairly sound now because you’ve got the list, you know what type of scenes you have and if they’re hitting story telling beats. Now, you need to make each scene as strong as possible.

Every bit of dialogue, exposition, action and reflection must move the story forward. If it doesn’t, that scene isn’t doing its job and it’s muddying your story.

To help me analyse the power of my scenes and exactly what they’re contributing, I use Jami Gold’s Scene Checklist and note what is working for each scene. Jami’s checklist is very comprehensive and I think it’s a good starting point but you still must address each point critically.

When using Jami’s system, I discovered that I had too many scenes in a row which did not increase the stakes. Sure, there was tension in those scenes, but in terms of the story goal, the stakes weren’t being addressed.

So the Scene Checklist helped identify problems, but how do you address them?

For every scene, ask:

1) Does it advance the plot?
2) Does it reveal character?
3) Has something changed for the character?
4) If it is an action scene, does it have a clear objective, obstacle and outcome?
5) If it is a reflection/reaction scene, does it have clear emotion, analysis and description?
6) Is the dialogue succinct and does it move the story/plot forward?
7) Is the exposition clear and succinct, create tension, and move the story/plot forward?
8) How can I address the problem identified in the check list?

Subplot scenes must, in one way or another, affect or contribute to the plot by complicating the protagonist’s goals. This could be by producing emotional or physical obstacles. Subplots are great for revealing character and increasing personal stakes. Do your subplot scenes contribute to story in these ways?

Using these questions as a guide, look for ways to strengthen each scene so that it is doing it’s job and has maximum impact.

When you’re happy that the scene is doing the work that you need it to, then it’s time to polish and make sure that every line and every word is doing it’s job, that voice is active not passive, that those pesky -ly words are minimized and you are showing and not telling, and dialogue is crisp and clean.

Revising scenes is a long hard process, there’s no doubt about that but the rewards of producing units of writing with maximum impact are certainly worth it for you and your readers!

Revisions, edits and proofing. The real work of writing.

Writing can be, and frequently is, easy. At least that first draft is. Sometimes a writer can fall into a creative “zone” and the words will just flow. And flow. And flow. I’ve seen many, many writers post on Facebook how they churned out 2,000, 3,000, even 4,000 words or more in a day.

I can do that. I do it when I really sit down and write.

But the question isn’t how many words you write in a day. The real question is how many words you’ve written in a day, you keep in the final version of the manuscript.

I tend to view writing as similar in concept to sculpting in clay. First you have to get the clay. That’s the first draft. You have to just keep churning out story elements, characters, plot points, settings, all the stuff that makes up a story. It all piles up into a sort of rough facsimile of the story you really want to tell. Eventually you complete the first draft, and can go grab a beer and congratulate yourself on your pile of clay.

But it’s not half done yet. Unless you are one of those truly rare writers who spew out nearly finished prose. Most of those writers have written and published lots of stories, and have learned how to get that first draft much closer to the final form.

The rest of us have to take that first draft and start turning it into something presentable. And that means taking the editor’s sculpting tools and carving off bits here and there, building up other bits, reshaping a limb or a nose… For many of us that is more of a challenge than the initial fountain of words that leaped up from our keyboards.

But sculpting usually takes several passes, each one more detailed, with more attention to perfecting the form and enhancing the presentation of our work. My approach is to take several editing passes through the, I hope, successively less rough drafts of the story. The first pass mostly focuses on big things. Do the character arcs work? Is the conflict compelling? Does the plot work, or are there gaping holes, or plot points leading to nowhere?

Only when I’ve addressed the story at that level will I do a grammar and spelling pass. Or two. It’s all too common for me to learn that in my first pass, I not only missed a few things, but I added some new errors in fixing the previous ones.

Then I do a pass focused entirely on converting passive to active voice, looking for occurrences of words like “seems” or “realized” or many other words I keep in a list that are all too easy to fall back on while writing, but leave the prose flaccid.

Then I do a pass focused on character dialog. Did I use the right vernacular for the different voices of the different characters? Did I accidentally give my New England bookkeeper the voice of a Louisiana shrimper? It happens more than you realize.

Then I do a pass focused on contractions. It always amazes me how many “can not” or “will not” uses I find in my writing. I know better, but I still find them. Lots of them. Trimming those syllables really tightens the text, especially dialog, where a “will not” comes across as pretentious or commanding.

Finally, when all of that is done, I move the still-rough draft to my iPad so I read it in a different format, and do my best to read it as if I had never encountered it before. I might do that three times before I’m satisfied it’s clean enough to pass my editorial expectations.

Then I send it to an editor.

Revisions ““ Discovering Those Great Plot Gaps

There’s no greater feeling than getting that first draft done! Celebrate, pat yourself on the back and then take a break. Yup, you heard me. Set it aside and walk away for a few weeks or a few months. Tackle another story, another novel, another writing project. This will accomplish two things – it’ll be easier to switch from being creative to editing and practice makes perfect so your improved skill level will help you revise.

My first revision always looks at plot gaps. There are several methods and each can be employed for their own reasons but the quickest and best one I’ve found is to write the dreaded synopsis. I use it for the same reasons editors do:  to see if the plot makes sense, if it creates tension and if there is a story arc as well as main character arcs. Some would argue that the original outline can be used this way. I choose to write the synopsis because it’s a fresh approach to looking at the novel and I’ve got to write it at some point.

For the purpose of revision, my synopsis is about 2,500 words for every 80,000 words in draft. The reason for keeping it so short is because I want to focus only on key elements in the plot and character lines. Subplots and side stories/events are examined later with respect to how they support the key plot points. The synopsis is written in third person, present tense and in the style or voice the novel is written in (humorous, chatty, dramatic).

Before you write the synopsis, make a note of the basic story arc which starts with the inciting incident. The inciting incident is what motivates the character toward a goal such as conflict resolution, finding true love, solving a mystery, saving someone, to resist change, etc. Then there are the obstacles to reaching the goal, the climax wherein the goal may or may not be achieved and then the denouement.

Like every good book and book jacket blurb, a synopsis starts out with a good hook. This introduces the protagonist, her motivations, goals and the conflict which keeps her from her goal. A synopsis isn’t a simple listing of events but rather it show how the events affect people and what they do which in turn affects plot and outcomes. Now, weave in the story arc, the key points of your plot, with your character’s actions, reactions while showing how they are affected by the decisions they make or actions they take. Use this method through the crisis and denouement.

When I read over the synopsis, I ask the following questions with every plot event:

  • Given the protagonist’s motivations, are her reactions and actions believable? If she really wants to save her family from the villains, why is she enjoying a glass of wine on the beach?
  • Is there enough tension between the protagonist and the antagonist? Does it increase until the climax?
  • Does this feel like it’s naptime? Has something been resolved too quickly? Are more obstacles needed? Remember, if you’re bored so will the reader be.
  • Does it move the story forward in a way which is exciting and logical? Or does it feel contrived, flat and unimportant?
  • Was this the most reasonable reaction and action for the character? Why didn’t she react another way? These questions focus on the logic problems of a character’s actions. For example, why didn’t Jean simply kill Maggie by pushing her over the ship’s railing when no one was looking? Why did she choose to slowly poison her to death? As the writer, you may know why, but did you communicate it clearly?

A synopsis is a great tool, even in the middle of a novel to check how your plot and character arcs are evolving. Recently, I was completing the first draft of a novel and I just couldn’t finish writing the last three chapters. Something wasn’t quite right and I didn’t know what. After writing the synopsis I discovered a couple of logic holes in a character’s reaction which didn’t fit his goals plus there was a plot logic issue. With these now understood, the draft was completed to my satisfaction. And, I’ve got a great tool to refer to during the revision to make sure the scenes, plot and character arcs in the manuscript follow the synopsis. Better still, I have a draft synopsis which I can revise for my queries.