Tag Archives: self-publishing

Working with Editors

Working With EditorsAs writers, we love to focus on writing, on creating that next great story.  It took me a while to realize that typing “The End” is only the completion of the first part of the process.  Once we finish that first draft, get the story out to beta readers, compile all the useful feedback, determine edits, and finish subsequent drafts, we finally have a story we feel rocks on all levels and is ready to go.

That’s when we need editors.

Some indie authors try to claim they don’t need an editor, but I’ve never seen any such story turn out well.  Not as well as it could have been.  Not as well as it should have been.  Not well enough to compete in today’s market with well-read readers who can spot an unedited story fast.

A book without an editor is like a theatrical production without dress rehearsal.  You’ve got the characters, the dialogue, costumes, and a setting, but the whole has not been polished to where an audience can enjoy it.

Why invest so much time in producing a book only to undermine the finished product?

Usually the reason is one of two things:  Time or Money.

Time:  with the internet making it so easy to get books available to readers, it is so incredibly tempting to skip the careful edit and just getting it out to readers faster.  Why wait when you could be selling copies already?  The truth is taking a little more time and polishing the story will result in far better reviews and far more copies sold.  I’ve started reading books that skimped on final polishing, and I was universally disappointed and usually threw the book away without finishing.

Money:  Editors are not free.  Yes, they’re an investment and authors need to find a way to cover that investment.  If you don’t believe in your story enough to make that investment, convinced you’ll sell more than enough copies to still profit, then how are your readers going to believe in it?

Then again, with avenues like Kickstarter available, it’s often now possible to raise the money to cover such costs up front instead of having to fork over all the cash yourself.  I plan to launch a Kickstarter campaign for one of my stories next year.

How do you find a good editor?  There are lots of editors out there, and just like anything else, there are good ones and bad ones.  Here’s where networking comes in.  Talk with other authors about editors they liked and ones they didn’t.  Good editors will provide a listing of stories they’ve edited, and that can provide great insight into whether or not they might be a good fit.

Once you find an editor, you’ve got to get on their schedule.  Good editors are sought after and usually their schedules are booked out weeks or even months.  Get on the list early, and don’t be late with your work.  If you miss your deadline, it may be a while before they can fit you in again.  If you see you’re going to be late, notify the editor as soon as possible to make it easier for them to rearrange their schedule with the least amount of disruption.

I worked with our own Joshua Essoe on the manuscript for Set In Stone, a YA Fantasy novel currently in the hands of my agent.  I realized I needed to make some significant changes to the manuscript prior to sending it in, so we had to reschedule a couple of times.  Joshua was very accommodating, but I tried to warn him far in advance, as soon as I realized I was going to be late.

That brings up another point:  make sure your book is really finished prior to hiring an editor.  If you’ve just completed your first draft, I’d recommend you take the time to have some beta readers finish it and compile their feedback.  It’s likely you’ll need to make some changes.  Go through it a couple more times to ensure it’s really where you want it, and that the book you wrote is really the book you thought you were writing.  Only then will you be able to maximize the benefit of an editor.   If they’re so busy giving you feedback on major structural issues with the work, it’ll be harder for them to help you really polish it.  And if you want to go back again to hire them for a second pass, that’s going to cost more since they now have to invest more time in the project.

Even when your book is DONE and ready to go, you’ve found the editor you think will be perfect for the work, and you’ve sent it off to them, there’s the question of style.  Some authors and editors just don’t see eye to eye on matters of style.  There’s no way I know of to completely protect yourself from running into a situation like this.

Working with Joshua, I was extremely pleased.  His comments were spot on, thoughtful, and insightful.  I agreed with his approach to editing, and almost universally applied his suggested changes.  With a different manuscript (also in the hands of my agent), I wasn’t quite so lucky.  The editor was very experienced and well respected in the industry, and much of their suggestions were beneficial.  However, we differed over some aspects of style.  At first this worried me, and I wondered which of us wasn’t getting it.  That’s where working with a second editor on a different work proved beneficial.  I could compare the two editors’ styles, and realized they approached the same questions sometimes from very different points of view, with very different resulting recommendations.

So I had to make very conscious decisions regarding my own style and how I wanted to apply tone and voice to each story.  I had made some of those decisions while writing, but hadn’t clearly defined it.  The editing process forced me to choose specific stylistic approaches in each story.  Only then could I see clearly which advice to accept and which to ignore.  In some cases, the editor didn’t understand the style, and gave bad advice.

Just like everything else, it’s a learning process, and I consider the funds spent on editing both manuscripts well worth the investment.

Take away:

  1.  Prior to engaging an editor, make sure the book is really done.
  2. Find an editor you feel you’ll be able to work well with.  Use advice from other authors, and do your research.
  3. Get on their schedule well in advance, and don’t be late with sending them the manuscript.
  4. Notify them early if you fear you’ll miss a deadline.
  5. Study their feedback carefully.  Some of it may not be right.  In the end, it’s your book and all decisions are your responsibility.
  6. Don’t ever release a novel without a professional edit.
Making Sure Your Ebook is REALLY Ready To Go

Pile of BooksThese days publishing a book isn’t the roadblock it used to be.  Many of us are e-publishing even while often still trying to land a traditional publishing deal.  It is so easy to get a book out there – almost too easy.

I’m seeing some pretty wildly differing stats on how many books were published in the past couple of years.  Bowker, the company that issues official ISBNs, lists the numbers of books published with those ISBNs, but many authors who only e-publish don’t bother getting an ISBN, so those numbers are woefully short.  I saw one statistic that claimed 3,000,000 books were published in 2011, and estimated 15,000,000 in 2012.

Even if those numbers aren’t 100% accurate, I think it’s safe to assume millions of books are flooding the e-book marketplace.  It’s so easy to e-publish that there are no quality controls out there.  The sad truth is that many of the millions of ebooks flooding the market are terrible.  I know several kids in high school and even middle school who proudly proclaim they’re published authors with multiple titles to their name.  They look at me funny when I tell them I’ve been writing for years and just released my first ebook and ask what took me so long!

The problem is – if your book is one of the awesome ones, it’s becoming increasingly difficult to get noticed and not lost in the flood.  That’s why promotion and marketing is becoming more important than ever.

When e-publishing the most important marketing tool you have is your book.  If you release a book before it’s really finished, before it’s well edited, without a striking cover, you’re tying an anchor around your own neck.

I’ve read more than one ebook that showed great promise.  It was ALMOST great.  But the author clearly rushed the process, lacked the discipline to do it right and polish it that last 5% that would have made it shine.  And as a result, all that hard work was wasted because the final book was merely decent.

In today’s market, we can’t afford to have a decent book, an okay book.  When e-publishing it’s vital to take the time to make sure our books are really ready to go.  Here are a few things to keep in mind to help get your book there.

Complete more than one pass.

A good author with a solid plan can write a pretty good book in a single pass, but that doesn’t mean it’s ready for immediate release.  It needs to be polished, fine-tuned, with each scene carefully reviewed to maximize its potential.  David Farland is famous for making up to 10 editing passes for his novels, each one focused on optimizing different aspects of the story.

Take the time to really finish your book.

Get it professionally edited.

Many e-authors hate this step and manage to convince themselves that they don’t need it.  Why bother actually investing in our work?  Better to just release it and watch the money roll in, right?

Wrong.  I can’t stress this one enough.  No matter how good you think you are as a writer, no matter how much blood, sweat and tears you’ve already invested in the work, you’re not done.  Readers can tell when a book is not professionally edited and they’ll feel cheated and never buy another of your books.

It was a humbling experience for me to see all the marks on a recent manuscript when the editor I hired returned it.  I don’t think there was a single page without some kind of mark.  I learned a lot, got insights into blind spots I never knew I had, and the resulting manuscript really shines in ways it never could have before.  Totally worth the money.

Like anything else, know your editor.  Some who claim to be editors aren’t worth your time.  You may have to contract with a few editors on different manuscripts to find one you really work well with.

One editor I highly recommend without reservation is our own Joshua Essoe.  Check out his website here.

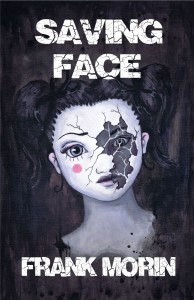
Saving FaceGet a killer cover.

Again, good cover art is an investment, although it doesn’t have to be a ton of money.  There are great resources out there for covers at reasonable prices.  Michelle Wilber, the woman who painted the cover for my ebook Saving Face is a talented artist who is a personal friend.  Many artists are willing to help with covers for ridiculously small fees as a way to help them also break into the market and be noticed.  It’s a win-win situation.

Unfortunately many authors just download the first clipart they can find on free sites and slap on a title.  Worse, some just download any image they like, even if they don’t have rights to it.  Don’t fall into that trap.  A good cover needs careful thought to present the right tone and brand, including the right font.  This is huge.  A good cover draws readers in, while a bad cover kills the deal before the power of your writing has any chance.

Format the book carefully.

Don’t just assume you can take your Word file and convert it into an ebook without more work.  Bad formatting marks you an amateur and drives readers away, and Word is notorious for inserting tons of special characters invisible while in that program but glaringly obvious when converted to ebook format.

I learned a ton about that process while prepping Saving Face for release.  I found some excellent resources to help.  If you are willing to do some simple technical work on your novel, it is definitely possible to produce quality output.

If not, there are great resources out there that will prep your ebook for you for a reasonable fee.  I haven’t used them myself, so I can’t recommend one over another, but you can easily get recommendations from other authors.  With a little research you can find the one that best fits your needs and budget.

I used two resources primarily in my formatting project:

First was Cheri Lasota’s ebook Design and Upload Your EPUB.  The Steps To Your Success.  This excellent resource is available for only $0.99 and is well worth the cost.  She discusses her approach for formatting an ebook, and walks an author through the steps of prepping a book and uploading it to both Amazon and B&N.

I also followed an excellent series of blog posts by Guido Henkel where he discusses in great detail his process.  His is slightly more technical, and if you have some basic HTML ability, is excellent.

There are many other great resources out there, and it doesn’t really matter which one you choose, so long as you make sure you follow one of them and carefully prep your ebook.

Even after utilizing both of these sources and carefully reviewing the final product, I still found a couple of minor errors after releasing Saving Face.  Thankfully both Amazon and B&N allow for updating a corrected manuscript.  Just don’t use that as a crutch to not doing the work up-front because anyone who’s already purchased your book is stuck with the errors.

If you nail all four of these areas, most likely you’ll have a rock solid ebook ready for release.  Coupled with brilliant writing, you’ve covered all the bases to become a player in the game.

Now, just need to figure out how to reach the 10 million readers I know are dying to buy my book . . .

Editing FAQ


Editor, Joshua Essoe

April has been a great month of posts from a bunch of awesome people who work in all the nooks and crannies of the book production process-illustrators, cartographers, designers, typographers, and, of course writers. We’ve had posts on the process from concept to completion, how to collaborate with other writers, and, of course, editing, editing, editing. Obviously a subject close to my heart.

I’d like to close out the month with some of the most frequently asked questions I get from writers, and most frequent issues I see in my day to day work as a full-time editor.

So without further ado, let’s just jump into it!


  • What is industry standard formatting?

This is the standard manuscript formatting that will be generally accepted anywhere you want to submit. It is the formatting standard by which I work as well. If a market or agent or editor needs something that differs from this, then it will be in their submission guidelines. Always go with the specifics they require and make sure to check. If they don’t specify, feel safe going with the old standard.

Specs for Industry standard: (in Word) 12 point New Courier, spaced “exactly 25 point” (not double spaced!) with widow control off; one inch margins all the way around; half inch first-line indent, header and footer; zero indentation and spacing; titles on seventh line down; and  name/title/pg# in the right-side header.


  • Should I use double spaces or a single space between sentences?

This is hot-button issue. If you don’t believe me, just bring it up the next time you’re around a bunch of writers. I’ll prepare for the hate mail now because inevitably this answer is going to make someone turn into a giant green rage monster.

The reason double spaces were used between sentences is because when people were using typewriters, editors needed a strong, definitive break between sentences. The monospaced font typewriters used didn’t create that, so two spaces were inserted. It isn’t necessary with word processors.

Whether you use one or two spaces these days comes down to a style issue. Some editors prefer one, some prefer two, however most style guides advise you use only one. As I understand it, page designers beg the use of just one to avoid the unsightly blocks of space that using two will litter a document with. If your MS is at that step, they’ll just have to remove all the double spaces anyway.

So forget the double spacing. I always recommend using just one.

Excuse me while I go lock my doors.


  • What the heck is passive voice?

A passive construction occurs when you make the object of an action into the subject of a sentence. That is, whoever or whatever is performing the action is not the grammatical subject of the sentence.

For example: “The next few hours were consumed with preparations for the journey.”

What is doing the action in this sentence? The preparations; however, the preparations are not in the spot where you would expect the grammatical subject to be-the hours are. So, to make this sentence active, rearrange it thusly: “Preparations for the journey consumed the next few hours.”

Look for forms of “to be” (is, are, am, was, were, has been, have been, had been, will be, will have been, being) followed by a past participle. The past participle is a form of the verb that typically, but not always, ends in “-ed.” Some exceptions to the “-ed” rule are words like “paid” and “driven.”

So here’s the formula for spotting passive voice: form of “to be” + past participle = passive voice.

I will sometimes call things out as passive storytelling that aren’t technically passive verbs or passive voice. I’ll mark both progressive and pluperfect tenses passive at times-note, I don’t mark them as passive verbs. When I do this, it means that there is a more dynamic way to write the passage I’ve highlighted. It could be made stronger and more vibrant with a different, more active verb. Progressive and pluperfect often present as good an opportunity as a passive verb to make your text more interesting.

Unless it is the most effective way to put something, try never to start a story off with something passive sounding. These kinds of things will often amount to personal preference. When I spot something like this, I’ll call it out so the author can decide what’s best for their story. Personally, I like active storytelling-I find it both more engaging and better able to draw pictures in my head. Most readers do.


  • How do I properly punctuate dialogue?

In dialogue, the only time you use a comma is when you are continuing a sentence after or before a tag. Note that when a comma is used, it indicates that the sentence is not over, so use lowercase when inserting a tag. Always put the comma inside the quotation marks if a tag follows the dialogue, and at the end of the tag if a tag precedes the dialogue. Use a period for everything that is not a tag.

For example:

  1. I guided her to my chair. “Sit here.”
    Not: I guided her to my chair, “Sit here.”
  2. “We need to get out of here.” His whisper sounded like a hiss of air.
    Not: “We need to get out of here,” his whisper sounded like a hiss of air.
  3. “We need to get out of here,” he whispered.
    Not: “We need to get out of here.” He whispered.
  4. She squealed, “Like, ohmygod!”
    Not: She squealed. “Like, ohmygod!” (Unless the squeal was a separate utterance.)


  • Do I write out numbers, or just use numerals? What about percentages and times?

This is one of those questions where if you ask a dozen different people, you’ll get a dozen different answers. Here is what I tell my clients.

For fiction, write out any number under 101, and numbers easily expressed in words like “one thousand.” This is the easiest rule of thumb to go by, and then let your publisher or editor make any in-house style changes they need.

As long as the number can be spelled out and still be easily understood without looking ridiculous, then spell it out.

If you’re writing dialogue, spell out all the numbers. Of course, even here The Chicago Manual of Style notes that you should use numerals “if words begin to look silly.” But the idea is that you should lean toward using words in dialogue.

All percentages and decimal fractions should be written in numerals. The only exception is for the beginning of a sentence, where the numeral would be spelled out. The Chicago Manual of Style’s general rule is to spell out zero through one hundred. Use the word “percent” for humanistic copy and the “%” symbol for scientific and statistical copy.

Normally, spell out the time of day, even with half and quarter hours. With “o’clock,” the number is always spelled out.

Use numerals, however, when exact times are being emphasized, or when using A.M. or P.M., but use “noon” and “midnight” rather than 12:00 P.M. and 12:00 A.M.

Bonus trivia-you can write “a.m.” and “p.m.” as lowercase letters with periods, or as small capitals without periods. Either way, there should be a space between the time and the “a.m.” or “p.m.” that follows. It’s more common to see lowercase letters followed by periods.

Also, when following an exact time with either, the time should be written as a numeral unless it is dialogue.


  • When do I use “which” and when do I use “that”?

Use “that” before a restrictive clause, and “which” before everything else. A restrictive clause is part of a sentence that you can’t get rid of because it specifically restricts some other part of the sentence.

For example: “Jewels that glow are worth more money.”

“That glow” restricts what kind of jewels we’re talking about, so you can’t get rid of it without changing the meaning of the sentence.

Nonrestrictive clauses include a part that can be left off without a change in meaning.

For example: “Jewels, which may glow, are worth a lot of money.”

Note that when you use a nonrestrictive clause it is set apart by commas.


  • Are there three or four dots in an ellipsis? Which do I use when a character stutters?

Use three dots when the ellipsis follows an incomplete thought; but include a period as normal, before the ellipsis, when following a complete thought.

When using an ellipsis, make sure that there is a space between it and the word it follows and/or precedes, and between each ellipsis point.

As for the second question, there is a difference between stammering and stuttering and, usually, I find the author means stammering. For that, the ellipsis is the better way to go. Em dashes are used to represent an interruption or break in thought, whereas ellipses are for trailing off, or pausing.

So, for example:

“Where is your sword-wait, you didn’t give it to them, did you?”

That shows a clean, abrupt break in the thought. If you replace with an ellipsis:

“Where is your sword . . .? You didn’t give it to them, did you?

This shows trailing off in thought before the beginning of a new thought.
If you combine you may get:

“Where is your sword . . . wait, you didn’t give it to them, did you?”

That is incorrect because you should finish and punctuate your first thought before going on to the next.

So, “I . . . I don’t know.” is the way to go for a stammer. “I” is a whole word, and thus should be treated as any other whole word.

If you were going for a stutter, you would use a hyphen thusly:

“I . . . I d-don’t know.”

The hyphen shows that the character utters the same sound multiple times while trying to get out a single word. (Since “I” is a whole word, that fact takes precedence over it also being a single sound.)


I’m quite out of room, so hopefully that answered some of your questions . . . and hopefully no rage monsters are now beating out responses with two spaces before each sentence.

Joshua Essoe is a full-time, freelance editor. He’s been editing and writing for twenty years in one form or another, but has focused on speculative fiction in the last several. He’s done work for David Farland, Dean Lorey, Moses Siregar and numerous Writers of the Future authors and winners, as well as many top-notch independents.

Together with Jordan Ellinger, Diana Rowland and Moses Siregar, you can find him waxing eloquent (hopefully) on the writing podcast Hide and Create. Don’t forget to check out the workshop that he and Kary English have created for this fall! Caravel Writing Workshop with Kevin J. Anderson, David Farland, Rebecca Moesta, and Grammar Girl, Mignon Fogarty, instructing.

Here There Be Dragons: Maps in Fiction

Jon Roberts_portrait
Artist, Jonathan Roberts

Guest Post by Jonathan Roberts

Let’s get one thing out of the way right now.

A map shouldn’t be pretty.

I know what you’re thinking – those posters of Middle Earth are gorgeous. Of course a map should be beautiful! But for worldbuilding purposes a pretty map is a Very Bad Thing. Beautiful things are precious, and we tend to want to leave precious things pristine and untouched. When we’re building worlds we need to break things, and often. So, out with any thoughts that we’re making a pretty map. We’ll be making a functional map. In fact we’ll be making many maps, one after the other. In exactly the same way that your notes are not the final manuscript, a map isn’t the final world. It’s a visual notepad, and you should be crossing things out, erasing sections and rebuilding from scratch as you go along.

So we won’t be needing photoshop today, we need a pad of scratch paper and a pencil. Ready? Right, let’s build a world.

First of all, think about the world you need to build. In many cases this is a defined area that’s much smaller than the planet you’re on. Very few stories truly span a globe, so let’s begin by cutting down to the area that the story explores. This keeps the work focused on a reasonable area, and means there will always be distant and mysterious lands to explore down the line.

In your tale there will be nations, city states or power centers of some form. Start by making a note of their relationships to one another. Are they at war? Are they aloof? Do they feud over resources or are they closely allied? Think over the things that make them stand out. Are they famous for their expansive grain fields? Their iron? Their navy? I’m sure you can see the theme here. Nations are defined by the geography they inhabit as much as we define the geography by the nation. A nation with a large navy needs sea access, but it should also have natural defenses like a mountain range that allows the nation to neglect other military forces in favor of its navy. Two countries at war need to be close, and need to have a means of attacking one another.

Focus on major terrain at this point–how much coastline and mountain range. Make notes about other terrain that comes to mind–the tulip fields of Alak’tor, the salt mines of Keshel. Those will come in useful later.

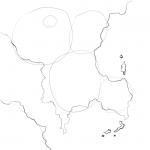
It’s now time to start our map. Grab a pencil and faintly draw in circles where your nations are. Nations that are allies or at war should be close. Those that rarely interact should be farther away, or have an insurmountable natural barrier between them. Drawing circles on a map may sound easy, but this stage can take a few tries to get the relationships right.

Jon Roberts_1BasicLayout
Stage 1: Circles. Yes, these are 6 interconnected nations!

But circles aren’t really a map. Let’s draw some coastlines. Think about which of your nations need large coastlines and which should be landlocked. Then let your pen wander. Really – avoid straight lines. Coastlines are jagged and broken things. If your line doesn’t look like it was plotted by a drunken ant, you’re doing it wrong.

Step 2: The coastlines. Keep them broken and randomized.

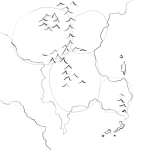
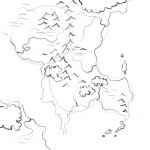
Now let’s lay in some mountains. Mountains tend to form ridges. Avoid the temptation to fill in whole blocks of land with mountains. Instead, lay them out in wavy lines. They often follow the edge of a coastline (think the Andes). From a story point of view, they form obstacles for your heroes and they create natural boundaries between nations, or between nations and the great unknown. Mountains also create boundaries between climates. So if you need a desert in one area and a jungle in the other, you’d better place a mountain range between them to stop the rain from the jungle getting to the desert.

Step 3: Mountains - they shouldn't be pretty, inverted triangles do the job just fine.
Step 3: Mountains – they shouldn’t be pretty, inverted triangles do the job just fine.

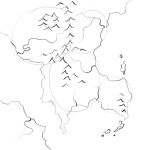
Next up, we have rivers. Rain falls on mountains and runs downhill to the sea. It always flows to the lowest point – and there’s always one lowest point. This means that rivers don’t branch as they flow to the sea, they only join. So – no rivers going from coast to coast. At some point that requires water to flow uphill. No lakes that have two separate rivers leading to the sea – remember, only one lowest point leading out. Think of a river like a tree. There’s one trunk where it enters the sea, but a panoply of branches reaching towards the mountains.

Rivers are also strategically important. There’s hardly a river mouth in the world without a town on it and most great cities lie on a river. If you know where your cities are going to be, make sure there’s a decent sized river flowing through them. Equally, rivers make great defenses. It’s hard to build a wall all the way along your nation’s border, but it’s almost as hard to get an army over a well-defended river as it is to have them scale a wall.

Step 4: As rivers run to the coast they only join, they never branch.

Add some hills to the edge of your mountain ranges. Lay in some forest and see how it looks. Remember, don’t be precious. If you don’t like it, start on a new sheet of paper. Sketch another coastline. Turn it upside down.

When you’re happy with the terrain, go over the pencil lines with pen, and erase the pencil–including your nation boundaries. Scan and photocopy the map. Go away and have some food.

When you come back, try the following experiment. Ignore your previous nations. Look at the virgin world with a new eye. If you were founding a country in the world, where would you start? What would be the key strategic choke points? Look at the world as if you were playing Civ. Where are the resources you need to defend, what lands would you try to annex? Use some colored pencils to sketch in different nations and boundaries. Edit the rivers if you need to, move things around. You’ve got lots of copies of the map–experiment.

Once you have a layout you like, we’ll add cities.

Step 5: Hills and Forests, add them wherever you see fit. These are easily moved.

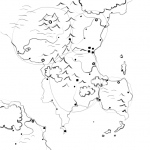
Cities are where they are for a reason. They don’t just appear up in the middle of nowhere. Population centers need food, water, trade and security. Rivers can provide all of  these, which is why towns and cities tend to spring up at river mouths. Locate your capitals in places that are easily defended and that have good transport connections to the rest of the nation. Place smaller cities in key locations, whether that’s in the heart of a mining community on the edge of a mountain range, at a key strategic river crossing, or a market town in the middle of leagues of prime cattle-ranching land. At this point, also mark in major fortifications.

Step 6: Place cities, towns and fortifications.

With these indicated it’s a simple matter to place the roads. These will connect the major cities, the main food producing regions, and any other major trade routes.

You now have a perfectly functional map! But remember, nothing is set in stone. Each time you run through this process your map will be better. Each time you sketch the map you’ll have new ideas. As you continue to write about your world you’ll come up with new thoughts on what terrain you should have, how two countries relate across their border, where a great wilderness needs to be. Redraw the map – it’s there for you. Both your map drawing and your text will be better for the relationship between map and story.

And when your manuscript is ready to go from draft to final, your map will be ready to go from sketch to illustration. But that’s a post for another day.

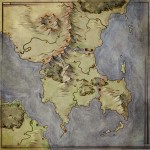
Step 7: Colored and finished!

If you want to learn about the art of mapmaking, then check out the Cartographers’ Guild, or my own tutorials.

Jonathan Roberts grew up in a old farmhouse between a ruined castle and a Bronze Age fort, so lands of the imagination were never far away. These days Roberts illustrates maps of real and imaginary worlds for a wide range of clients, from brides looking for an unusual wedding map, to the lands of Westeros and Essos for George RR Martin’s Song of Ice and Fire. Along with his own illustration work for books and games, Roberts has curated New York gallery shows of maps by illustrators around the world.